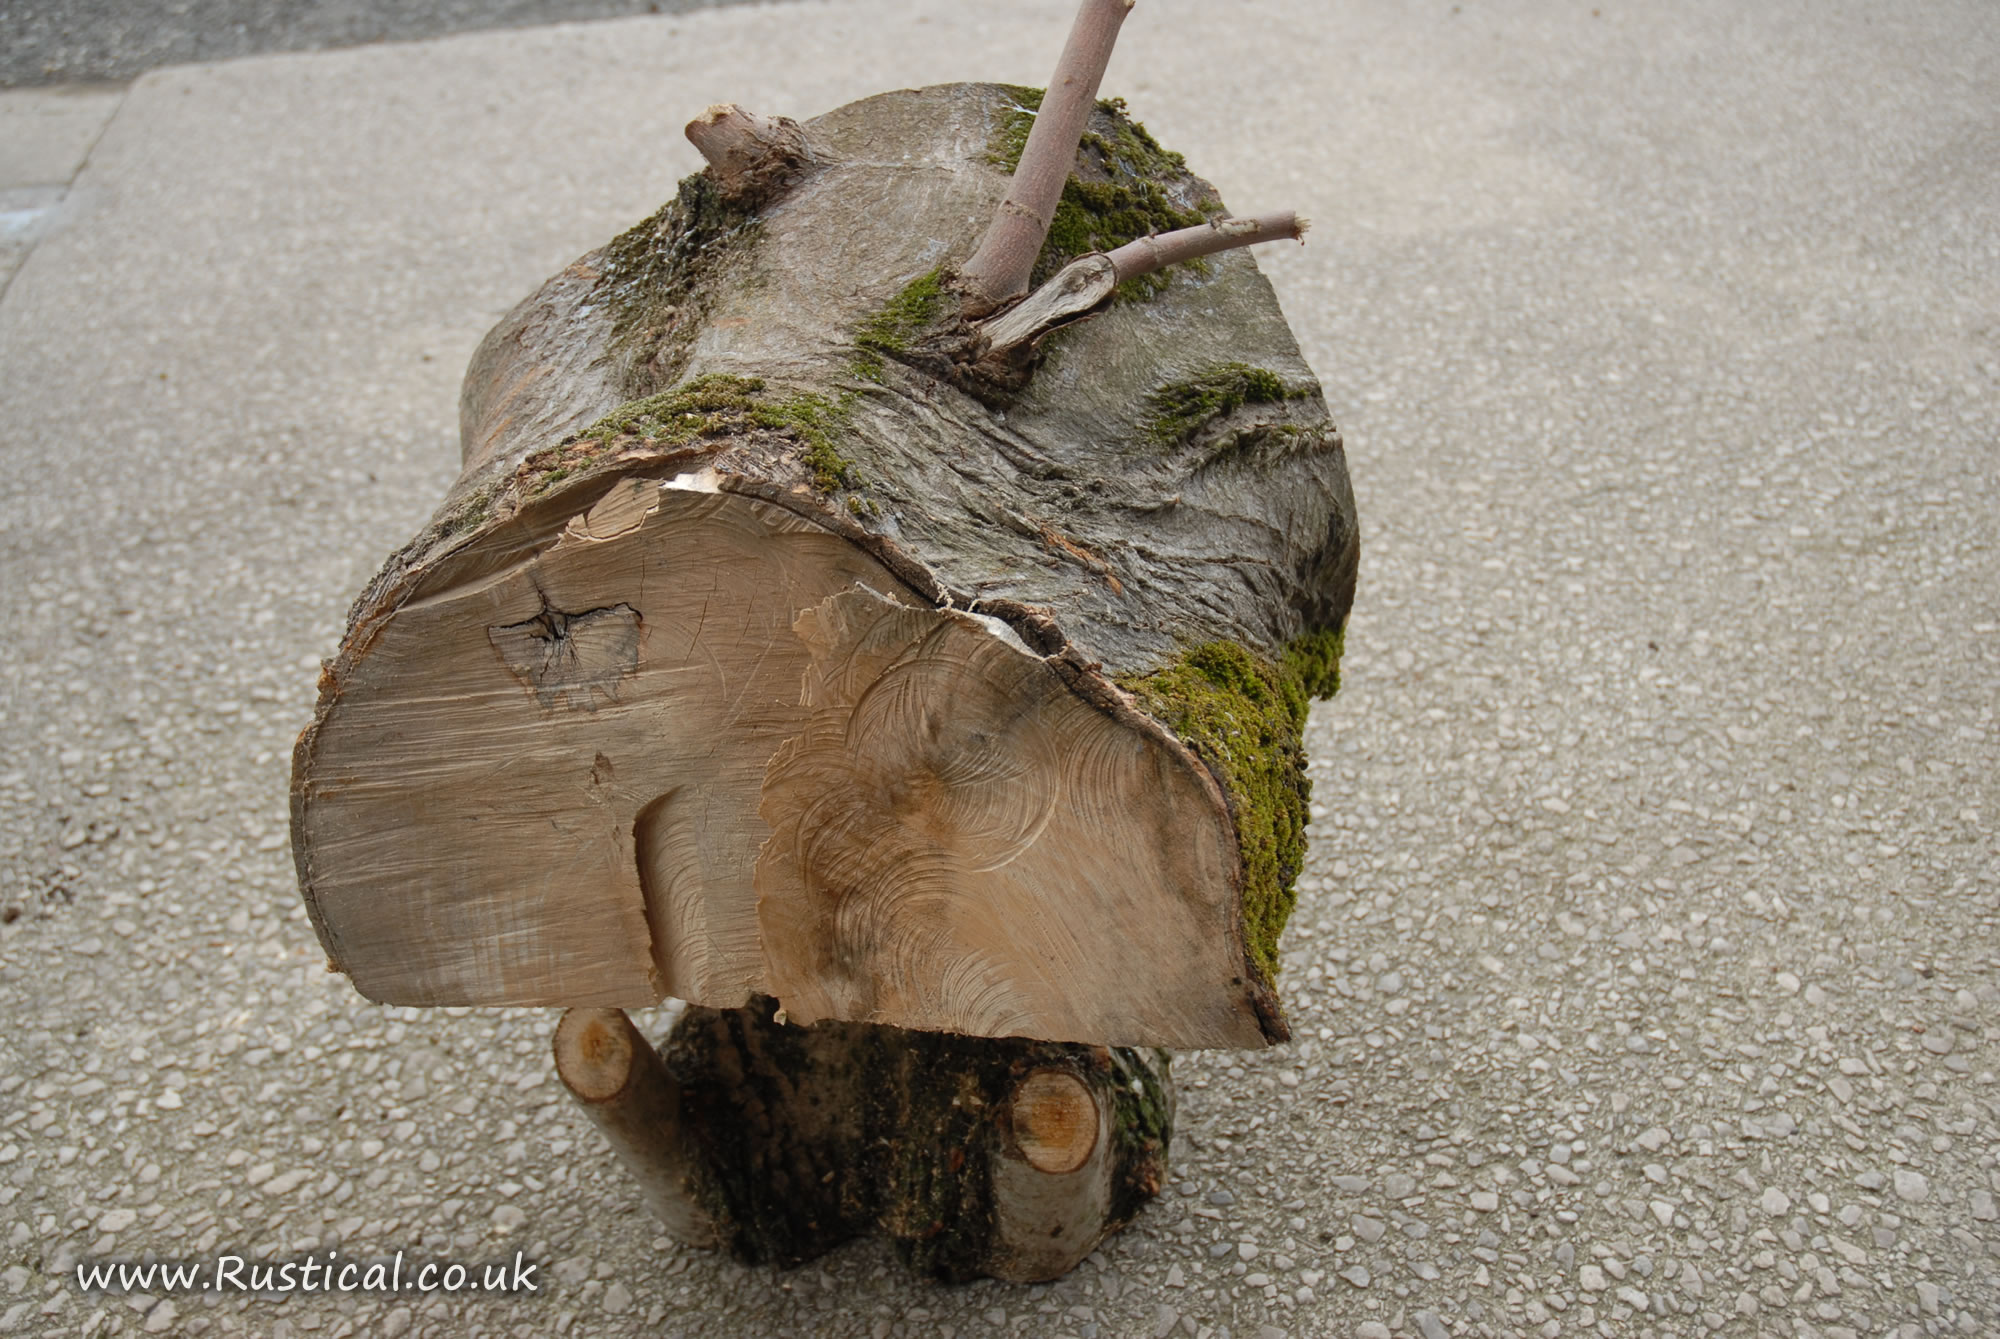
I have seen quite a few impressive wooden pumpkins on the internet and decided to have a go. Luckily I had recently rescued a large union of freshly felled Sycamore that the wood fairies had left behind as it was too big and nasty to split for firewood.
The original ‘big lump’ of wood was first sawn into three pieces to make it more manageable and placed on a cherry log podium work bench.
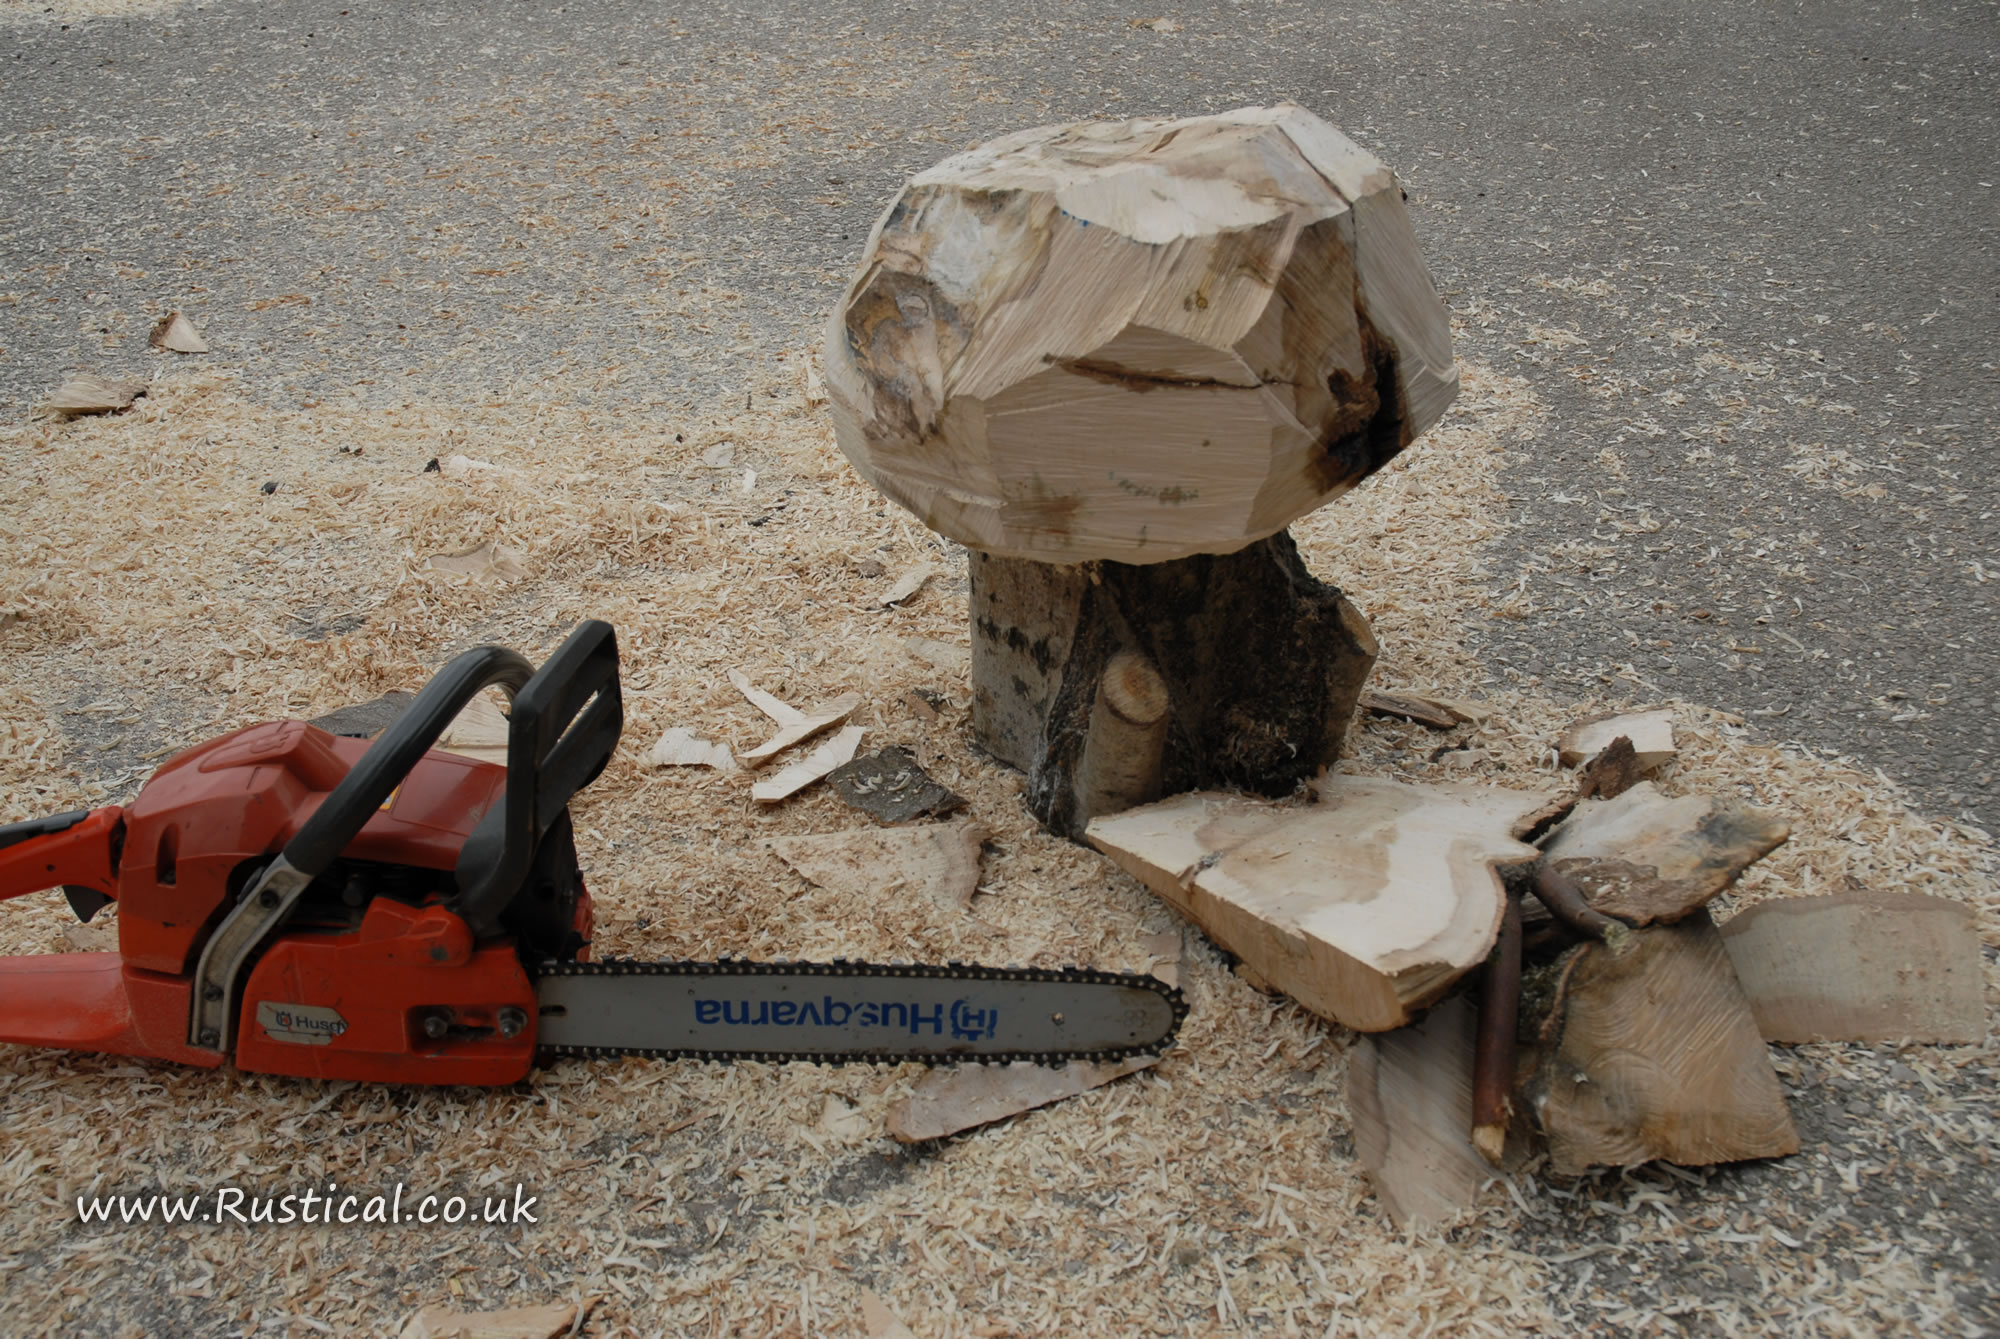
The log was then trimmed with a chainsaw until a rough pumpkin shaped had been achieved.
The wooden pumpkin was then planed to shape and a first pass of 60 grit sand paper applied. A hole was popped into the top and a nice curved piece of Hazel found to make a pumpkin ‘stem’.
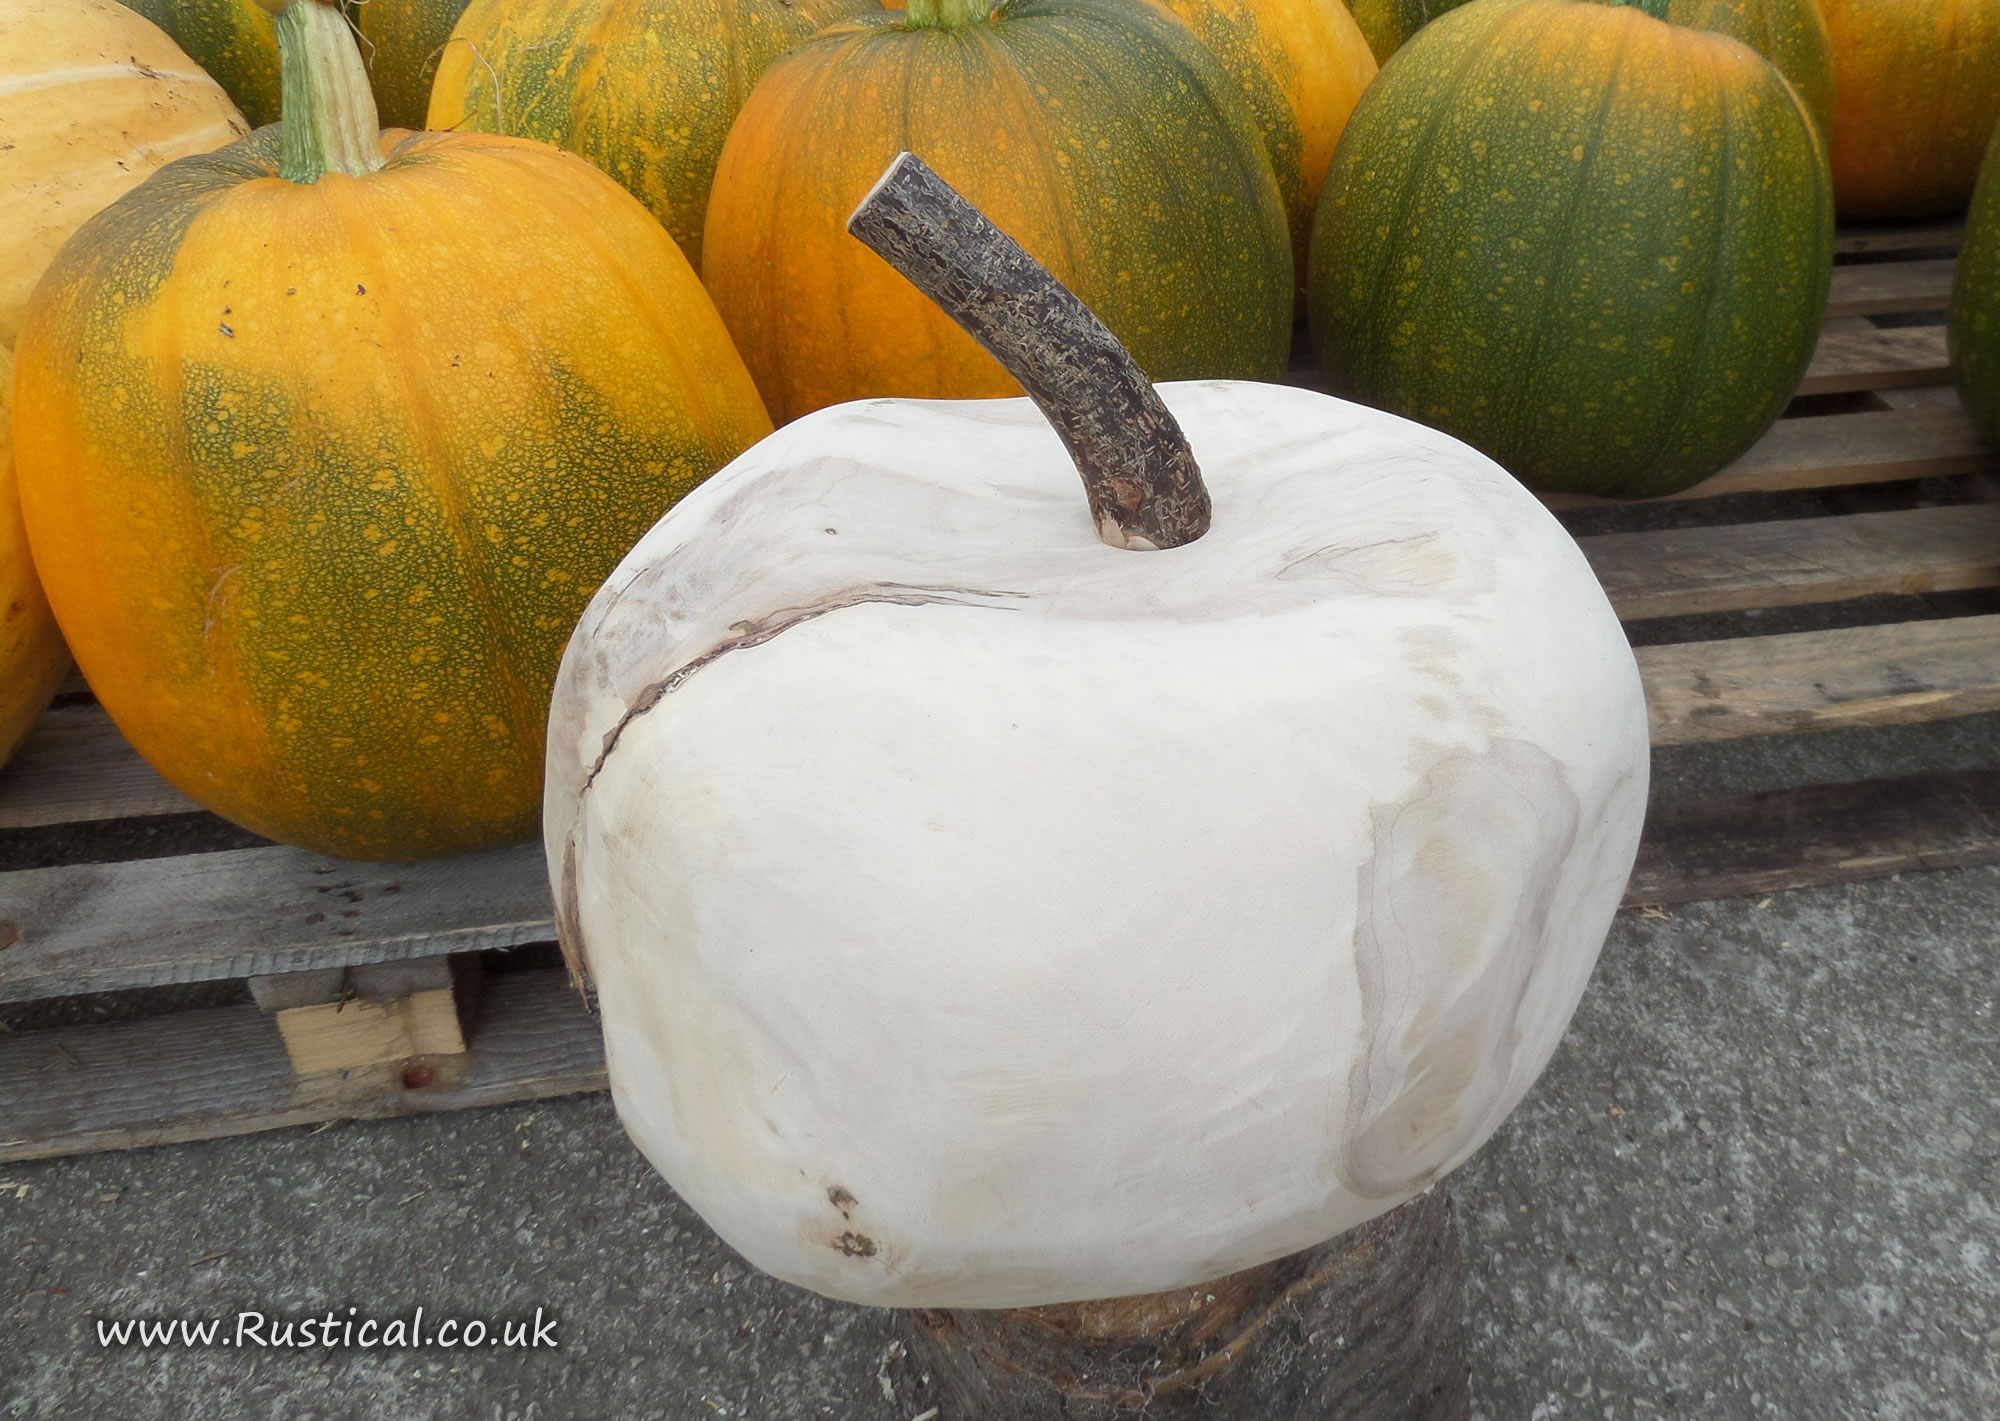
As the wood is unseasoned and still very wet there is no way of sanding a proper finish so it will be stored and finished next year when it has fully seasoned. This will give me a year to make a decision; varnish, wax or paint. I suspect the pattern of the grain around the union will mean it is left as a wood finish but I am so tempted to try a coat of chalk paint to see how that looks.